获取 NGC 秘钥
1)登录 NGC | NVIDIA GPU Cloud 官网,创建 NGC 用户并登录
2)在右上角用户名的下拉界面点击 setup
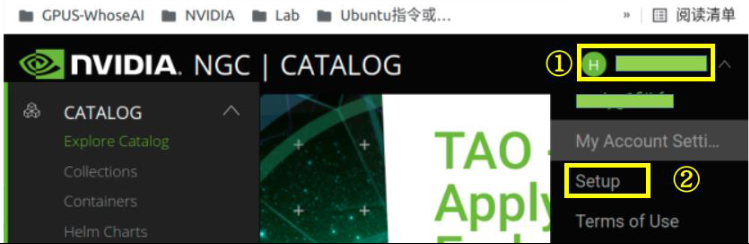
3)进入 setup 页后生成 NGC 秘钥并做好记录,该秘钥在模型训练过程以及推理过程都会使用到,且只有在创建时可看到秘钥内容,无法后续进行查询

下载相关资料
下载大赛网盘中相应的资料,资料目录结构说明如下:

配置 NVIDIA GPU 环境
系统要求
x86 CPU + NVIDIA GPU + Ubuntu 18.04 以上
安装 NVIDIA 驱动
NVIDIA 驱动要求 460 以上版本,安装完成后需要重启,重启完后执行 nvidia-smi 检查驱动
1 | root@Alex-McAvoy:~$ apt-get install software-properties-common |
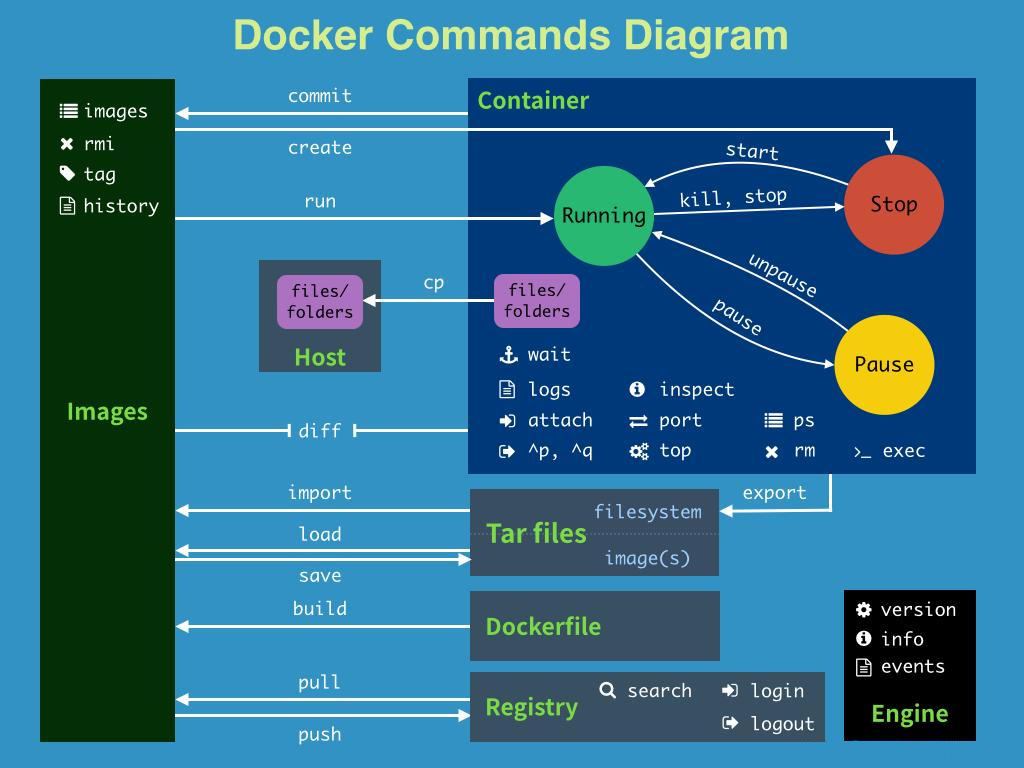
安装 docker
关于 docker,详见:docker 手册,命令图解如下:
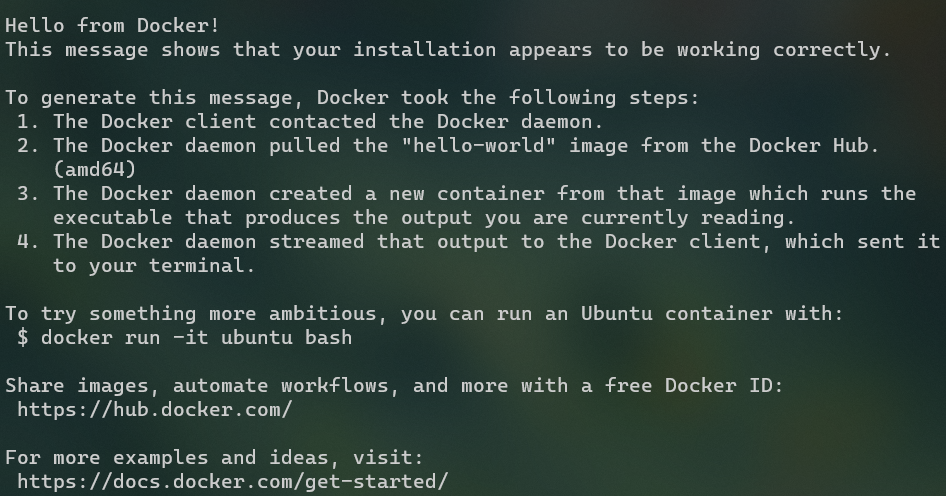
安装完毕后,使用 docker run hello-world 测试是否安装成功
1 | root@Alex-McAvoy:~$ apt-get install -y ca-certificates curl gnupg lsb-release |
当出现以下信息后,说明 docker 安装成功
安装 nvidia-docker2
安装完毕后,使用 docker run --rm --gpus all nvidia/cuda:11.0.3-base-ubuntu20.04 nvidia-smi 测试是否安装成功
1 | root@Alex-McAvoy:~$ curl -s -L https://nvidia.github.io/nvidia-docker/gpgkey | apt-key add -distribution=$(./etc/os-release;echo $ID$VERSION_ID) |
当出现以下信息后,说明 nvidia-docker2 安装成功

登录 NGC
1 | root@Alex-McAvoy:~$ docker login -u '$oauthtoken' --password-stdin nvcr.io <<< '申请的密钥' |
安装 GPU 版本 Pytorch
使用 nvidia-smi 查看 GPU 详细信息,可以看到,已安装的 cuda 版本为 11.8,之后通过 pytorch 官网,根据 cuda 版本和操作系统版本等信息,选择对应版本的 pytorch

1 | root@Alex-McAvoy:~$ pip install torch==1.12.1+cu113 torchvision==0.13.1+cu113 torchaudio==0.12.1 --extra-index-url https://download.pytorch.org/whl/cu113 |
安装 MiniConda3
1 | root@Alex-McAvoy:~$ export DL_SITE=https://mirrors.tuna.tsinghua.edu.cn/anaconda/miniconda |
Jupyter Lab 开发环境
安装
1 | root@Alex-McAvoy:~$ pip install jupyter jupyterlab |
启动
进入工作目录 7thSkyHackathon 后,执行下述命令启动 Jupyter 即可
1 | (tao)root@Alex-McAvoy:~/7thSkyHackathon$ jupyter lab --ip 0.0.0.0 --port 8888 --allow-root |
此时,在浏览器输入 URL,并输入密码后,即可进入到 Jupyter Lab 界面